Showing posts with label 6 ingredients or less. Show all posts

Wednesday, October 24, 2012

The Tomato Sauce Recipe No One Should Live With Out! A Famous 4 Ingredient Sauce That Happens To Be The BEST Tomato Sauce Ever!

I know what you are thinking... How can a simple 4 ingredient sauce be the best sauce ever?  I am sorry to admit that I usually buy my tomato sauce.  It is such an easy nice thing to have on hand.  I have made crock pot sauce, stove top sauce and it has been good but a little labor intensive and not really that  much better than the jar sauce.  I know it is healthier, but sometimes you just don't have time for all homemade.  In fact, I had jarred sauce in my cupboard when I went to make a baked pasta dish the other day.  When I was looking on line for a good pasta bake recipe I landed on one that included this tomato sauce.
2011_04_18-Sauce03.jpg
Photo courtesey of The Kitchn where I found this great recipe!
The blog post raved about the richness, smoothness and deep flavor of this sauce.  It looked so simple and I had all the ingredients, because who doesn't have 1 onion, salt, butter and a can of tomatoes?  Evidently this is a true Italian recipe by Marcella Hazan from a cookbook called Essentials of Classic Italian Cooking
Essentials of Classic Italian Cooking

So here it is!  The simplest tomato sauce recipe you will ever make that give you rich, full flavor, mouth watering results!

Marcella Hazel's 4 Ingredient Tomato Sauce Recipe
1 onion cut in half
1 28 oz. can plumb tomatoes
5 Tablespoons salted  butter (I did not use all 5 Tablespoons, and it was still delicious)
Salt to season to taste. ( I like sea salt)
Throw all of the ingredients into a pot and simply simmer this concoction for 45 minutes or so on the stove top.  The butter adds an incredible richness and really brings out a deep flavor in the tomatoes.  Now Marcella says to remove the onion all together.  I tasted it and it was delicious!  However, I decided to leave it in for the added nutritional benefit and just used an immersion blender. Now prepare to be amazed! INCREDIBLE! 

That is it!  You can memorize this classic recipe and have a quick fix for any night you are in need of a quick supper.  Just toss this over whole grain pasta, or add to any recipe calling for tomato sauce.  I would imagine this would be great to make in large batches and can!  Then you can have the convenience of jarred sauce and all the goodness of homemade taste!  Let me know what you think!  Have any simple recipes we should know about?  Share them in the comments.  Thanks!
Photobucket

Friday, July 13, 2012

All Natural, DELICIOUS Watermelon Lime Sorbet with No Added Sugar!


I was at Trader Joe's while visiting my sister in Santa Fe and saw these beautiful watermelons for $3.50!! Half the cost of what they are where I live.  So I decided to make a delicious, refreshing, TOTALLY HEALTHY watermelon lime sorbet.

You can make it with an ice cream maker or without!  The recipe is very simple.
Watermelon Lime sorbet
Watermelon Sorbet
Photo courtesy of Rachel Ray
My version is sweet, light, refreshing, and oh so delicious as well as being completely healthy! 


8 cups of cubed watermelon
1/3 cup fresh lime juice
1 tsp powdered stevia 

Now you can make this two ways.  The first way does not require an ice cream maker. For this method simply place the watermelon chunks on a cookie sheet and freeze.  While that is freezing mix your stevia into your lime juice.  Once the watermelon is frozen throw it and the lime juice stevia mix into the food processor .   Since the fruit is frozen it will blend all nicely and stay a nice sorbet consistency with out the need of the ice cream maker.

 If you want to use the ice cream maker throw all the ingredients into a processor or blender and then into the ice cream maker.  If you have a room temperature watermelon you may have trouble getting your ice cream maker to freeze it all the way past a slush.  So start with cold or slightly frozen watermelon.  If you choose to use a warmer melon you may just need to throw it into the freezer for the last bit.  If you are serving it right away keep an eye on it that it doesn't freeze too hard!  If you are serving it later you will need to pull it (if frozen hard) out of the freezer early to let it warm to a better consistency and shave with a fork before serving.

My regular sized watermelon (not personal size and not huge) made two batches in the ice cream maker and left me a batch and a half of watermelon lime mixture for popsicles!  The kids loved it both ways and I felt great giving it to them!  I have really tried to keep my kids sugar intake limited and this is a fun way of doing it so they don't feel deprived.  In fact the neighbor boys scarfed them down as well and didn't even notice the lack of added sugar!  Let me know how it goes.

P.S. If you are looking for some other sorbet, smoothie and popsicle recipes check out these posts I did earlier with TONS of recipes that will refresh on a hot day, satisfy a sweet tooth and keep you looking great in a swimsuit!

Refreshing Mango Strawberry Lime Salad
Green Smoothie Guide. 
Cool Summer Treats that Cure the Urge to Splurge! 
All Natural No added sugar Mango Sorbet


Photobucket

Tuesday, June 12, 2012

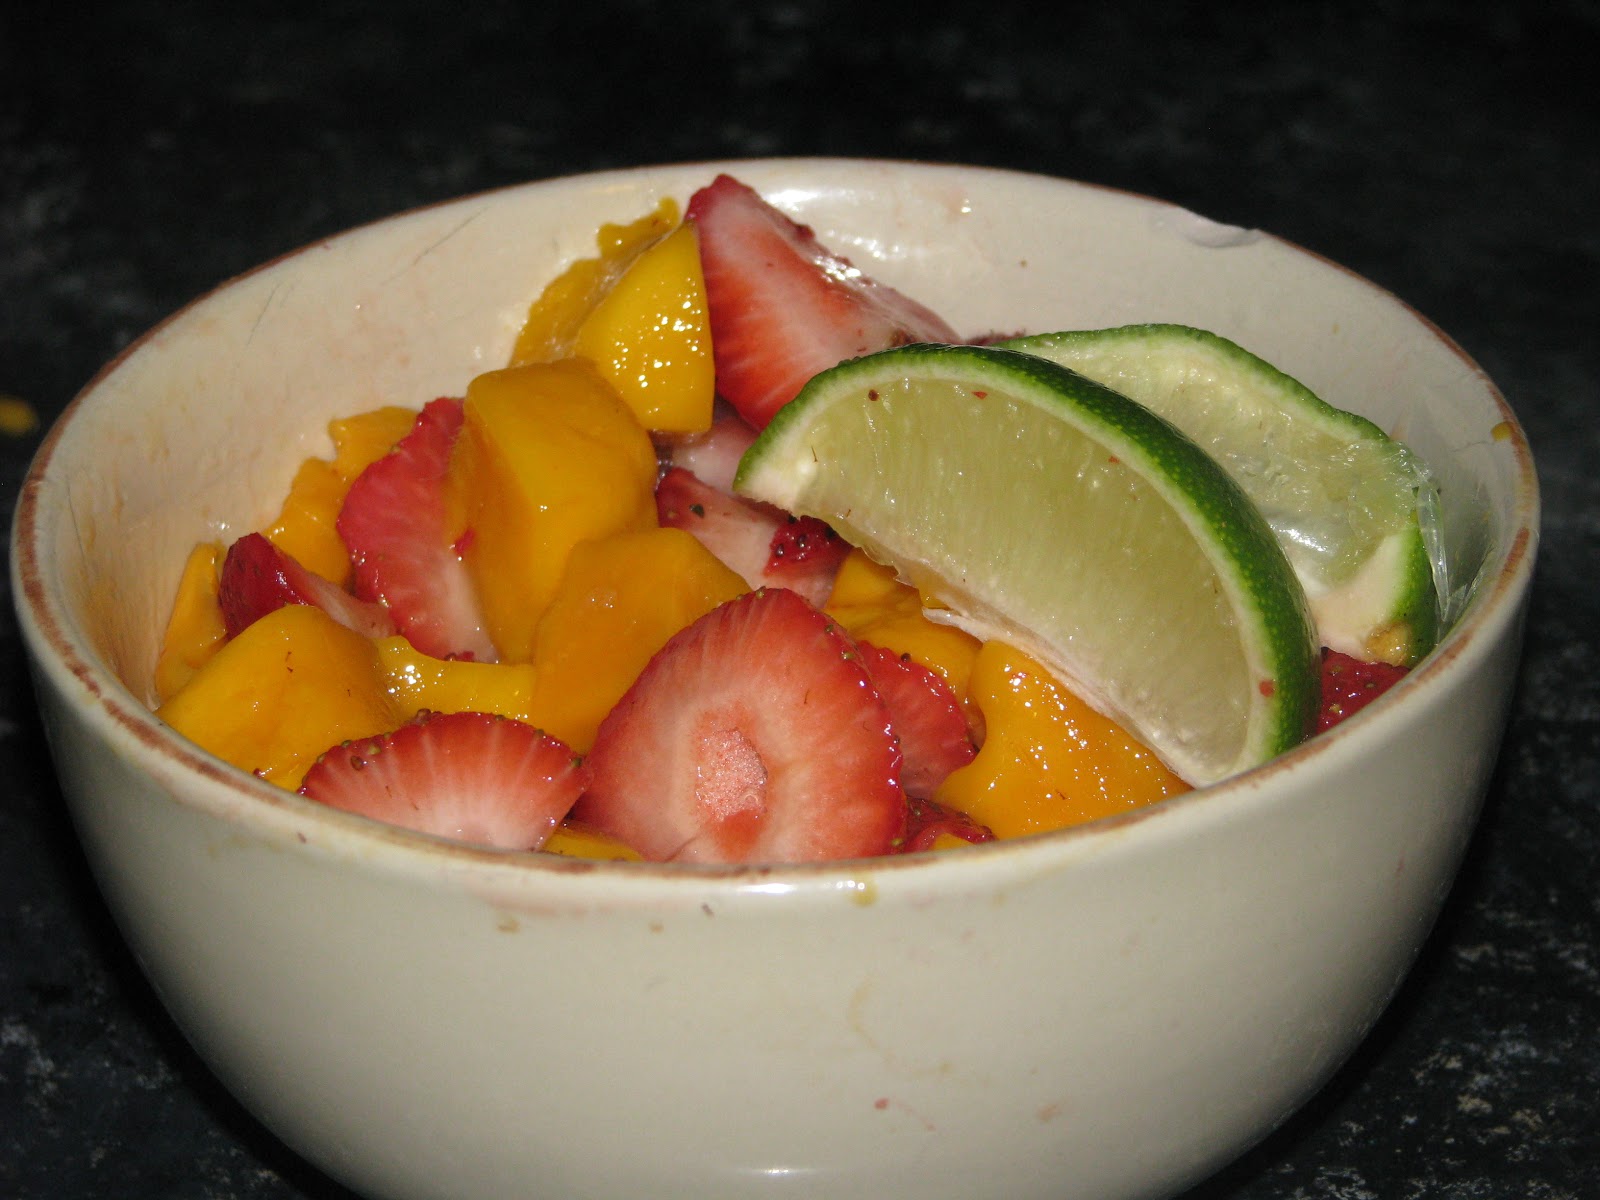
Refreshing & Delicious Strawberry Mango Lime fruit salad!

I know that this is not a very complicated fruit salad, but the taste combinatioin is incredible.  So I had to share it!  I just went to Sams's club and they had great deals on the mangoes, the strawberries and the limes.  So to fend off a late night dessert attack last night I made this.
It was so delicious!! All you need is a handful of strawberries, a lime ( or just a wedge or two), and a champagne mango.
 I know some people are not familiar with the best way to cut a mango so I demonstrated it here.  It makes it much easier.  You simple cut off the two sides of the mango, leaving the slice with the seed as thin as possible.  Then as pictured below you score the mango first lengthwise and then width wise.
 When you are done you should be able to pop it inside out and have little chunks ready to go.  You can see that I cut a little too deep as you should not cut through the skin at all.  This is how we cut mango when we just eat the mango off the skin.  We drizzle with fresh lime and eat the chunks right off.
For the salad you follow the steps above to cut the mango then flick the chunks off with you thumb nail into the bowl.  Slice up your strawberries however you like and squeeze your lime wedges over the top.  That is it! Just stir it up and enjoy!
Simple, healthy and INCREDIBLY tasty!
Photobucket

Monday, May 7, 2012

Homemade thick and creamy crockpot yogurt!

With 4 kids, a desire to eat truly healthy and a small budget we try hard to make as much of our food as possible. Mind you, we homeschool and with a 2,3,5, and 7 year old it is pretty tough to find time to make all the things I want to, but we are working on it.  I have recently quit buying store bought bread, and we just make our own whole grain bread instead.  If we run out of bread and I don't have time to make it we make some quick biscuits or handmade whole wheat tortillas.  It saves us a  ton of dough (pun intended :) ), and we get to skip all those unpronounceable ingredients that are even in the healthy breads!

So now that we have made that change we are trying to add homemade yogurt to our list.  I have made it before but usually it was too runny, and the thermos style yogurt maker we have made too little for our big family.  I checked into some strains of starter you could buy that cultured right on your counter without the addition of heat, but it turned out that it produces a more stringy gluey style yogurt.  That was NOT what I wanted.  So I started researching what made a rich, creamy, thick yogurt without adding anything additional to the yogurt like gelatin.  After reading countless blog posts, blogger comments, and more this is what I came up with...
A thicker rich and tangy, yogurt with a nice creamy consistency.  Much to my delight my son said and I quote "Wow!  This tastes just as good as the store kind!"  Just what I was going for!

Without further ado.. Here is the recipe with all the tips, tricks and "need to know's" mixed in.

1.Bring one 1/2 gallon organic WHOLE pasteurized milk up to 180 degrees in a pot on the stove.  DO NOT SKIP this step.  


If you want to use the crock pot exclusively and skip the stove top method you can add the cold milk to the crock pot and cook on low for 2 1/2 hours, then unplug the crock pot and let it sit with the cover on for 3 hours before continuing on from step 4.
I use a candy thermometer to monitor the temperature.  Keep an eye on the milk as you are heating it to make sure not to burn the  milk.  This breaks up the proteins in the milk to smooth thick yogurt, kill competing bacteria that will give the yogurt an off taste, and stops the whey from separating out as much.  Do not use ultra pasteurized milk as it doesn't have enough healthy bacteria to culture properly.  For a thick yogurt you really need whole milk.  You can make it with reduced fat milk, but it will be runnier.  The addition of powdered milk (about 1/2 Cup) can help to offset this if you are set on using reduced fat milk.  Many bloggers suggested that the quality of your milk really effects the overall end product so I used Horizons Organic whole milk.

2. Place the pot in a sink full of cold water to bring the temperature down to 105-115 degrees. 
Don't mind that fact that my thermometer has been completely disfigured by a run through the dishwasher.
3. While this is happening turn on your crock pot to low for 15 minutes before adding your milk.  Now turn off your crock pot.
Do not forget to turn it OFF!!
I did forget once and had a boiling thick cottage cheese like mess hours later.

4. Now that your milk is down to 105 degrees and will not kill your starter, take out about a cup of the warm milk and thoroughly whisk in your 1/2 cup of starter yogurt.  Add this back into your milk and thoroughly incorporate.  
How thoroughly you mix this in will determine how incorporated your starter will be through out all the milk mixture and therefore how smooth and creamy (think lump less if that is a word) your yogurt will turn out.  I used open nature brand from Safeway.  It is very important that the starter be FRESH. Do not open it until you are using it and then freeze the rest in 1/2 cup portions for the next time you need starter or just save out 1/2 cup of the resulting yogurt.

5.  So your milk and starter should now be fully incorporated in a crock pot that is turned OFF.  

6.  Wrap the crockpot tightly in a thick towel, and DO NOT MOVE IT! Wait 7-15 hours for a full, rich, creamy yogurt.
It is very important that the yogurt not be disturbed by curious little hands or moving around, so find a spot it will be safe in.  Now comes the part where you have to restrain yourself and be patient!  The longer it sits the thicker and tangier it will become.  Because everyone's home's temperature will vary you will just have to see what works for you.  I got mine out at 7 hours but will try waiting longer next time to see how I prefer it.
And that is it!   I like to use mine to replace sour cream and mayo in recipes, or add stevia and frozen berries to eat it for breakfast, bake with it in place of cream,  as a base for a delicious fruit dip, add it to smoothies, flavor and make popsicle or frozen yogurt.  The list is endless.


To make greek yogurt just strain it in cheese cloth for a day or so to remove some of the liquid.  

So the process itself is simple, yet it seems that the little tips and tricks can make the difference between grainy, thin, stretchy yogurt and thick, smooth, creamy and tangy yogurt.  I vote for the latter!  Ever made yogurt?  Share your tips and tricks with us!
Photobucket

Saturday, March 17, 2012

Homemade HEALTHY & DELICIOUS blueberry syrup

We love our pancake weekend breakfasts!  I love how healthy and fast they are.  Use the whole grain pancake mix I posted the recipe for the other day or the oatmeal pancake mix I posted a while ago to make a GREAT base for today's CRAZY good blueberry syrup.  My favorite part is that the syrup feels like a special treat I am allowing the kids but it only has 1/4 cup honey in the whole batch.  The kids end up eating WAY less sugar than if I just allowed them to help themselves to the maple syrup, and they prefer the berry syrup!
Blueberry Syrup
adapted form eatingwell.com
  • 2 cups fresh or frozen (not thawed) blueberries, or any other berry or cherries.
  • 1/4 cup water
  • 1/4 cup honey
  • 2 teaspoons cornstarch
  • 1 teaspoon lemon juice
  • 1 teaspoon vanilla extract
Just mix all the ingredients together on the stove while the pancakes are cooking and stir occasionally till the syrup thickens. That's it! Eat up!
Photobucket

Friday, January 13, 2012

Fresh beet juice & coconut milk? In an ice cream recipe?

I love food!  Ethnic food, comfort food, vegetarian food, and pretty much any GOOD food.  Over the years studying natural health on the way to my Masters I have tried (much the dismay of my carnivore, junk food loving husband) the majority of the current diet trends, and whatever nutritional program I was learning about at the moment  I spent 7 years as a strict vegetarian and still eat a mainly vegetarian diet. Tried a glutton free, sugar free diet (hard!), swore off all non "clean eating" foods after watching "Food Inc." (a must watch!)...for a while anyway. Before that I had tried the Atkins diet in the 90's (and promptly GAINED 10 lbs on it!).  Years later I did the "South Beach" diet (short lived but better than Atkins), and followed the "AB'S diet" after the birth of my 2nd baby.  At some point in there I also got into juicing, and lived in Italy and ate whatever whenever (think nutella, pasta, etc... not a pretty sight).  Now years later in my 30's, 4 sweet babies later, Masters degree finally earned I have discovered something...I am not willing to settle for cardboard tasting, boring food.

I want it all!  Delicious and healthy.  I have also discovered I do not do "plans" or "diets" well. So as the New Year begins and I focus on my health and eating anew I have been on a quest for truly healthy (not just low-cal) DELICIOUS foods. Here are a few recipes I think fit the bill, but don't let me decide for you. I expect to hear  how much you love the yum factor coupled with the nutrition aspect!

2012_1_12-NewYearIceCream-lead.jpg
Beet juice coconut ice cream from the kitchn
How delicious does that look?  Amazing food blogger Sarah Kate did the impossible and combined cleanse worthy fresh fruit and veggie juices with a few clever hard working ingredients to create a truly unique rich and creamy dessert that even the strictest diet can't outlaw! Thank you Sarah Kate!  Throw a few raspberries in there, and some stevia to sweeten it up if needed and you can rival the real thing...with out all the calories, dairy, and artificial ingredients that is!

What more could you ask for? Unless you are looking for an equally satisfying delicious main dish to go with it...and here it is. 
Italian Falafel or as the inventor calls them "(Not) meatballs"

One of  my all time favorite food blogs Budget Bytes (up there with my other favorite Enlightened Cooking) has come up with a truly inspired chickpea creation called "(not ) Meatballs".   I have eaten these 3 times in the last week and I LOVE THEM!! They make a perfect simple lunch.  I skip the pasta and marinara and just flatten them a bit so I can cook them in a pan with just a spay of olive oil.  YUMMY!! My kids love them too, and even my husband.  Don't get me wrong he would still prefer some baby back ribs but he settles happily for whatever I cook since the rib thing is not going to happen here.  What a good guy!


I would love to go on a web hunt and share more (there are lots!), but the fact that it is now almost 1 o'clock in the morning and this is the fourth time I have tried to get this posted pushes me toward bed.  I had to stay up and get this posted as I just couldn't give up since these recipes were too amazing not to share! I am going to call it a night as I am pretty sure Cruzy my 11/2 year old will be in to wake me pretty soon! Bummer....

Love to hear some of your healthy fun creative recipes.  Make sure to share them in the comments.
Thanks guys!
Photobucket

Thursday, June 9, 2011

4 ingredients - Roasted Acorn Squash with Spinach and Gruyere


For our 6 ingredient or less series (every Thursday) here is a new one...


Roasted Acorn Squash With Spinach and Gruyere


 Photo from www.food.com

Only 4 ingredients!  Healthy and easy get the recipe here!
Photobucket

Wednesday, June 1, 2011

Wellness Wednesday -Cool summer treats that cure the urge to splurge!

Everyone loves cool treats when it is hot out and somehow the vacation mode summer brings also brings the urge to splurge.  While an occasional ice cream cone or frothy pina colada is OK, it isn't great on a more frequent basis.   My kids want cool treats on a daily basis so here are some healthier options..


Frozen fruit kabobs-
Skewer chunks of bananas, melon, grapes, berries, pineapple chunks, peaches and other fruits onto kebab sticks and freeze.


Frozen fruit chunks-
Freeze chunks of fruit like slices of peaches. pineapple slices, bananas, berries, grapes and melons on a wax paper lined cookie sheet and once frozen transfer to a zip lock freezer bag.

Frozen banana bars-
Cut bananas in half on a wax paper lined cookie sheet and drizzle with all natural  chocolate syrup and nut pieces.  For fuller coverage dip into chocolate syrup and roll in nuts.  Freeze then individually wrap and transfer to a freezer zip lock bag.
Norpro Ice Pop Maker

Norpro Ice Pop Maker from Amazon ($17.69)

Fruit juice popsicles-
Make your own popsicles with out the artificial colors, high fructose corn syrup, and any of the other added junk.  Use any combination of fruit juices and fruit pieces.  Try an orange juice with pineapple chunk combo, or homemade lemonade with raspberry pop. Homemade green tea with peach pop?  The possibilities are endless... I am wishing I had this book.  It looks so fun!


Pops!
Cool + Sweet + Refreshing = Pops!

This innovative book gives the ice pop a flavor makeover, providing more than 100 recipes and variations for irresistible concoctions you’ve never tasted before. You’ll also learn fancy
techniques for making whimsical pops that look as fun as they taste. Kids will enjoy the juicy pops and flip over the soda fountain and pudding pops. Grown-up kids will dig the energy-boosting coffee, tea, and healthy energy pops and delight in the sophisticated cocktail pops. And for the do-it-yourselfers, this book provides instructions for making your own pop molds from recycled housewares and even silicone. When it comes to pops, the possibilities are endless—and so much fun!


Yogurt pops-
Use your popsicle molds for yogurt pops.  Use plain unsweetened yogurt and add your own natural sweeteners like stevia or xyilitol etc (Still not sure what to use?  See my previous post on natural sweeteners here.)  then add frozen fruit chunks or puree it all in the blender.  For the blended option throw yogurt and fruit or fruits of choice in the blender with a small amount of juice.  Just enough juice to make the blending easier and then pour into molds.


Coffee and tea pops-
Mix up a double strength version of your favorite tea or coffee beverage and add natural sweetener and a shot of soy or regular milk then pour into molds.  Try floating some frozen berries in the tea version or other fruit and add a few chocolate chips to your coffee pops. Or add a little all natural chocolate syrup to your coffee pop before pouring into molds.


Homemade pudding pops- 
Making homemade pudding pops is not that hard and you get to skip all the added sugars, chemicals etc and can tailor them to your personal taste.  Even though these are definetly a sugary treat you won't want to have every day they are a satisfying lower fat, lower calorie alternative to ice cream.  Here is a recipe from taste of home that would work and I also like that it can be made as a mix and stored ahead of time.
Ingredients

Pudding mix:

  • 2 3/4 cup non-fat dry milk powder
  • 1 1/2 cups sugar ( you can reduce if you want)
  • 3/4 cups cornstarch
  • 1 tsp salt

  • pudding
  • 2 1/4 cups milk or water
  • 1 egg beaten well 
  • 1 Tbs butter or coconut oil
  • 1 1/2 tsp vanilla extract
  • Combine the pudding mix ingredients and store in an air tight To make the pudding combine 1/4 cups milk or water and mix in a pan on the stove.  Bring to boil stirring occasionally and boil for one minute.  Remove it from the heat and stir in a small amount to the egg.  Return it all to the pan.  Cook and stir over medium heat for 2 minutes.  Remove from the heat add butter or coconut oil and vanilla.Mix well cover and chill 2-3 hours before mixing with milk.  For popsicles just pour into molds and freeze.

Fresh Lemons - Microsoft Clip Art
Suite101
Lemon Sorbet

1/2 cup lemon juice (fresh or bottled)
1/2 cup sugar 
1/2 cup dry white wine
1/2 cup water
1 egg white

Stir water wine and sugar in saucepan till melted.  Boil for 10 minutes, then lower the heat.  Now simmer uncovered for 10 minutes.  remove from heat and cool.  Now add the lemon juice.  Stir well.  Pour into a container and freeze until firm but not solid.
While waiting for mix to freeze beat egg white till firm. The beaten egg white prevents large ice crystals from forming.
Transfer all the frozen mix to a bowl and beat with a fork, now mix in the beaten egg white.
Freeze the sorbet till firm but mix often to prevent it from turning into a block of ice.


Of course no list would be complete with out a few smoothie recipes. 


Pina Colada Smoothie Recipe 

1 cup frozen pineapple chunks
1 cup coconut milk
1 frozen bannana sliced
1/4 cup ice cubes
2 tsp honey

Blend till smooth.

My favorite berry smoothie recipe
1 cup orange juice (sometimes I water it down to save on calories or switch it out for tazo passion tea made very strong with stevia for sweetner)
1 cup frozen mixed berries
1/2 cup yogurt (plain no growth hormones)
1/2 frozen banana ( I keep these on hand when bananas go on sale and break them in half and freeze on a cookie sheet then transfer to zip lock bag).
a few pieces of ice.
Blend in blender.  If it needs more liquid just add a little more juice.  This one can easily be changed by switching up the fruits and juices used.  You can freeze juice in your ice cube tray if you feel the ice is watering it down.

Now go have some summer fun and enjoy these healthier treats guilt free.  Just be sure to choose the healthiest ones more often and eat those filled with more sugar sparingly.

Have a few ideas of your own?  Let me know in the comments! I love to hear from you all!


Photobucket

Thursday, May 26, 2011

Thursdays 6 ingredients or less -Pan-Roasted Chicken with Shallots

Yum here is what I found for Thursdays 6 ingredients or less recipe from my heart healthy online.

Pan-Roasted Chicken with Shallots


Pan-Roasted Chicken with Shallots
Makes: 4 servings
Start to Finish: 20 minutes

Ingredients

  • 8  shallots or 1 large onion
  • 4  mediumskinless, boneless chicken breast halves (1 to 1 1/4 pounds total)
  •   Salt and ground black pepper
  • 1  tablespoonolive oil
  • 1  mediumzucchini, halved lengthwise and cut into 1/4-inch slices
  • 1/4  cupsnipped fresh parsley

Directions

Peel shallots; halve small shallots and quarter large shallots. If using onion, cut into thin wedges (should have 1 cup shallots or onion wedges); set aside. Sprinkle chicken lightly with salt and pepper. In a large skillet, heat oil over medium-high heat. Reduce heat to medium. Add chicken; cook for 2 minutes.
Turn chicken. Add shallots to skillet.Cook for 8 to 10 minutes more or until chicken is no longer pink (170°F), stirring shallots frequently and turning chicken, if necessary, to brown evenly. If necessary, add additional oil to prevent sticking. Reduce heat to medium low if chicken or shallots brown too quickly.  Transfer chicken and shallots to a serving platter. Cover to keep warm. Add zucchini to skillet. Cook and stir for 3 to 5 minutes or until crisp-tender. Add to platter with chicken. Sprinkle with parsley.
Photobucket


Saturday, May 21, 2011

The Entrys for 6 ingredients or less cooking... Choose your favorite..

I asked you guys to send me your best 6 ingredient or less recipes and here are the ones that came in this week and one of mine...


Easy Breezy Heart Healthy Lunch To Go

Healthy Whole wheat tortilla wrap
Filling:  Hummus, Avacado, Baby Spinach, Grilled Chicken
On the side:  Baby Carrots and Grape tomatoes
For Dessert:  Mixed Fruit Puree
To drink:  Almond Chocolate milk or Arthurs Green Energy drink
from Char
The Epic Adventures of a Modern Mom...20,000 Leagues under the Laundry


Sweet Potato Hash Browns

6 c. diced sweet taters (with skin on)
3 T. butter
1/2 c. coarsely chopped red onion
1-3 jalapeno, diced
salt and pepper to taste

Add sweet potatoes cubes to medium saucepan of boiling salted water. Boil about 10 min. Drain. Melt butter in pan over medium high heat. Add onions and japs. Saute. Add potatoes, salt and pepper. Mix well and cook until browned.

From Ashley Paine


Salmon Patties 
15 oz. can of alaskan salmon, 
2 egg whites, 
3 cloves of garlic,
zest of 1 lemon, 
salt and pepper.

Mix all ingredients in bowl. Make into 4 patties. Drizzle skillet with olive oil on medium heat. Place patties on warm skillet for approximately 5 minutes on each side. Pairs well with a yummy salad and dressing of your choice! 
From Ashley Paine

And now for one of my favorite weekday go to meals...
Taco Soup
2 cans of pinto beans
2 cans of diced tomatoes (fire roasted or Italian, any flavor will work)
1 can of corn
chopped onion (however much you want)
Taco seasoning

Saute diced onion still partially cooked .
Add in tomatoes, beans, corn, and sprinkle in taco seasoning to taste.
Heat till warm through.  Chips, cheese and sour cream optional toppers. 

Let me know which ones you like and keep sending them in!

Thursday, May 19, 2011

Portabello Fajitas - EASY with only 6 ingredients!


 Yummy!  These are one of my favorite quick & healthy meals.

thinly sliced onion
bell peppers cut into strips (fresh or frozen)
sliced portabello mushrooms
whole wheat tortillas
taco spices

Just saute up the sliced onions, bell peppers (I prefer the red ones or a bag of the frozen mixed strips), and portabellos with ateaspoon or so of  taco spices.  Then warm the tortillas over the stove in a dry skillet.  Serve with salsa and cheese and/or sour cream if you want.